How to Use Elixir

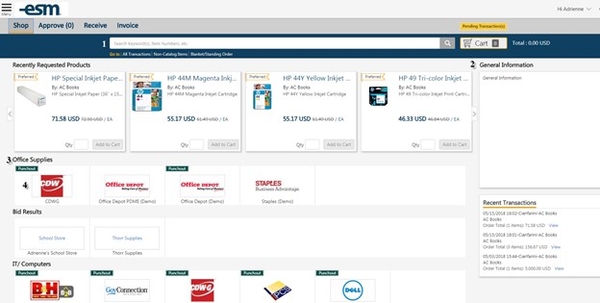
Elixr is found on the my.westernu.edu webpage. Most companies we purchase research-related items through are on the front page when you log in. 

Need to purchase something?

If you need to set up Elixir or get training click here. Please email POINT at point@westernu.edu should you have any additional questions! 

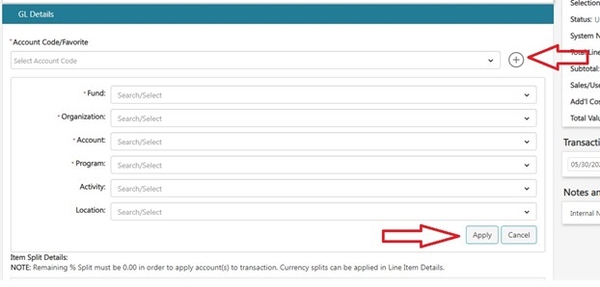
  • Sometimes, vendors are not in Elixir yet and need to be added. Procurement can assist you in adding the vendor to Elixir. Email POINT who will tell you everyone you need! 
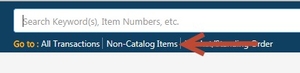
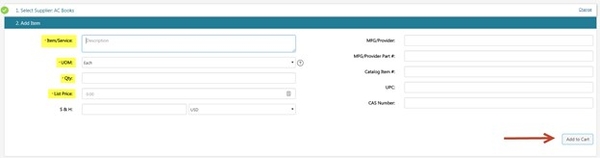
  • For items that are not available, such as primers, a quote will need to be obtained. These are referred to as non-catalog items. For these items, please contact the vendor you will obtain the item from to get an official quote. Quotes typically last 30 days. 

Elixer Walk-Through

The Requester can select various items in assigned catalogs or search for the item they need.


From this screen, there are several options:

  1. Choose a catalog. When one of the catalog icons is clicked, a "Punch Out" session begins in a new browser window.
  2. Search for an item. The system administrator has chosen which catalogs to include and has preferred catalogs as well. This is demonstrated below.

When searching, you can filter by

  1. criteria
  2. quantity

When both of these are met, hit add to cart. The total quantity of items and prices is listed behind the Cart. You can continue to shop or go to cart by selecting Cart or View Cart. 

You can edit the quantity or delete items in the cart screen. When ready, convert the cart to transaction by selection Check out. More than one transaction may be created if you have multiple items from multiple suppliers.

Complete each portion of checkout. Select continue on each section to save/confirm your choices. You will be walked through room delivery, shipping address, and then adding your FOAPAL. 

Once the details are in, you can add notes and attachments as well. You will need this for AIRGAS and for any item you are entering that you obtained a quote for. 

When you get to GL details, you will need to add your Account Code or FOAPAL from either the drop down menu or the plus sign. FOAPAL stands for Fund, Organization, Account, Program, Activity, and Location. Location is rarely needed as it is added in shipping. 

Once the FOAPAL is added, click CONTINUE. 

You will then be taken to the line item details, here you can make any last minute edits. When done, click continue. 

View the workflow details. If all looks appropriate, click Submit or forward the transaction the appropriate approver. 

.


The Requester creates a Non-Catalog Item by selecting the Non-Catalog option under the Search Bar on the Shop tab. A Non-Catalog Item allows the Requester to create an item that is not provided in the catalogs, if the Supplier has allowed for it.


Enter the product detail’s required fields (Item/Service, UOM, Qty, and List Price) to create the item and ‘Add to Cart’.

If need, add the Quote to the Notes section!